

Bad Audio Does Not Read as Bad Audio
Two researchers ran an experiment that should change how creators spend their gear budget. Eryn Newman and Norbert Schwarz took identical conference talks and identical radio interviews from NPR's Science Friday, played them to listeners in either high or low audio quality, and asked those listeners to rate what they had heard. The words never changed. Only the recording did. Participants rated both the research and the researcher less favorably when the audio quality was low.
That is the part creators miss. Nobody watching a hollow, echoey video thinks bad microphone. They think you sound less credible, less prepared, less worth another ten minutes. The penalty lands on you, not on your gear.
We see it from the other end. Across 10,000+ edited projects and 100M+ views, the defects Mark Studios flags as genuinely unfixable are almost never picture. They are audio — and they were almost always decided in the sixty seconds before someone pressed record.
The Four Links in the Voice Chain
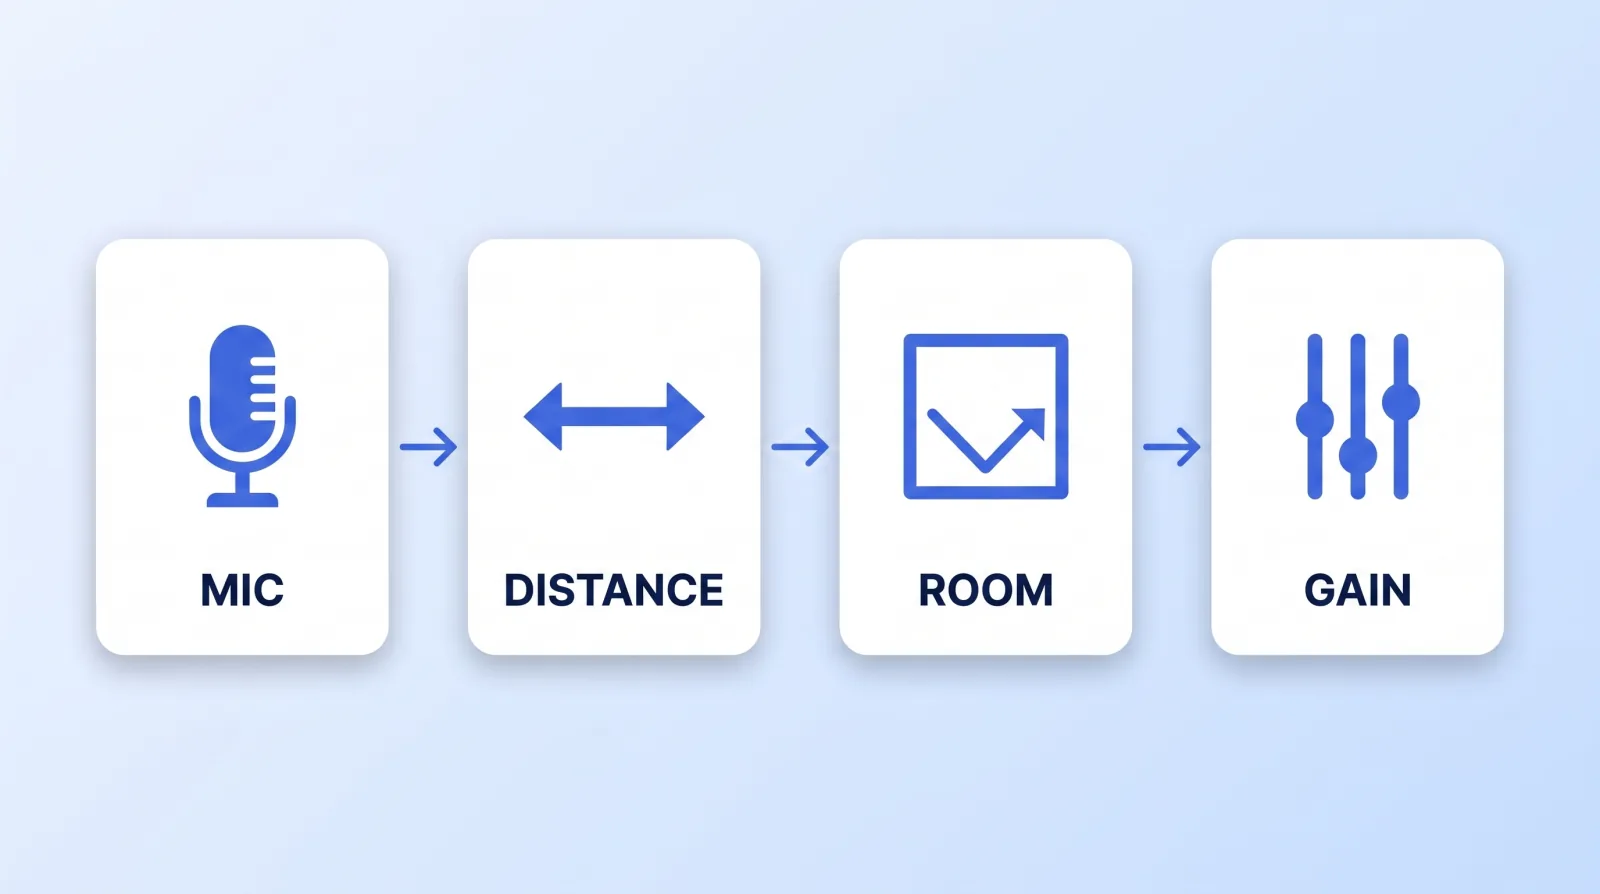
Every recorded voice passes through four links, in this order, and the worst one caps the result — true whether you're recording a podcast or a straight talking-head video. A $400 microphone in a bare room loses to a $100 microphone in a treated one, every time.
- Mic — the transducer type, and how much of the room it rejects.
- Distance — how far your mouth sits from the capsule.
- Room — how much of what the mic hears arrived by bouncing off a wall.
- Gain — how much of your converter's range the signal actually uses.
Creators overwhelmingly spend on link one and ignore links two through four. Invert that priority and most channels get an audible upgrade for the price of nothing.
Distance Is the Setting Nobody Adjusts
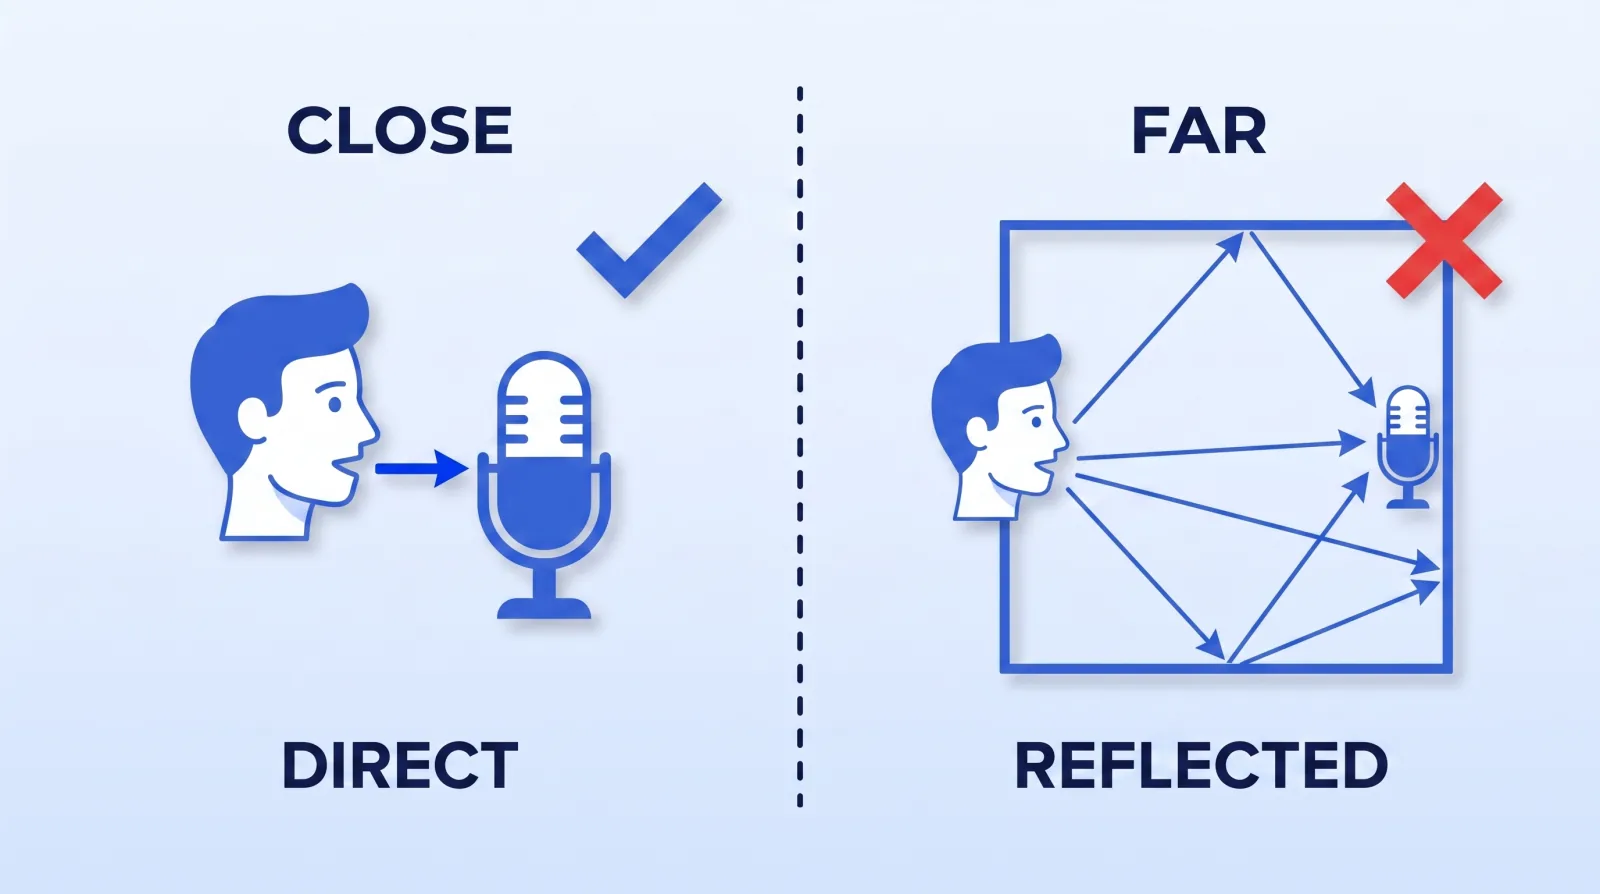
Sound follows the inverse square law: double the distance between mouth and capsule and the direct signal arriving at the mic drops by about 6 dB. The reflected sound bouncing around your room does not fall nearly as fast, because it is arriving from every direction at once.
Which means distance is not a volume control. It is a ratio control — direct voice against room. Move from six inches to two feet and you have not made yourself quieter, you have made your room dramatically more present in the track. Then you raise the gain to compensate, and the room comes up with you.
These are the working distances we hold clients to:
| Mic type | Working distance | Room tolerance | Best for |
|---|---|---|---|
| Broadcast dynamic (Shure SM7B) | 2–4 in | High — rejects most of the room | Untreated rooms, voiceover, podcasts |
| USB dynamic (Shure MV7) | 2–4 in | High | Solo creators on one desk |
| Large-diaphragm condenser (Røde NT1) | 6–10 in | Low — hears everything | Treated rooms only |
| Wireless clip-on (Røde Wireless GO II) | 6–8 in, on the chest | Medium | Talking head, movement, multi-location |
| Shotgun on a boom | 12–18 in, overhead | Medium-low | Cinematic sets, multi-person shoots |
The condenser row is where most creators go wrong. It is the microphone that sounds best in reviews, because reviews are recorded in treated studios, and it is the microphone that sounds worst in a spare bedroom. If your room is untreated, a dynamic mic at three inches is not a compromise — it is the correct choice.
Fix the Room Before You Buy the Microphone
Stand where you record and clap once, hard. If you hear a ring, a slap, or a tail after the clap, that sound is going into every take you shoot in that space, and no microphone upgrade will remove it.
In return-per-dollar order, this is what actually works:
- Soft goods on the first reflection points. The wall behind the mic, the wall behind you, and the bare floor between. A rug, a duvet on a stand, a full bookshelf. This is free and it does most of the work.
- Break up the parallel surfaces. Two bare walls facing each other create flutter echo, the metallic ring you hear on a clap. Anything irregular between them kills it.
- Get off the wall. Recording with your back six inches from drywall puts a hard reflection into the capsule a millisecond behind your voice. Move to the middle of the room.
- Skip the thin foam. The 1-inch acoustic foam sold in creator kits absorbs high frequencies and leaves the low-mid boxiness that makes a room sound like a room. Thick soft goods outperform it.
For podcast video production with two or more people, treat the space before you add a second mic. Two untreated mics in one room capture each other's reflections and the problem compounds.
Gain Staging: Set It Once, Then Stop Touching It
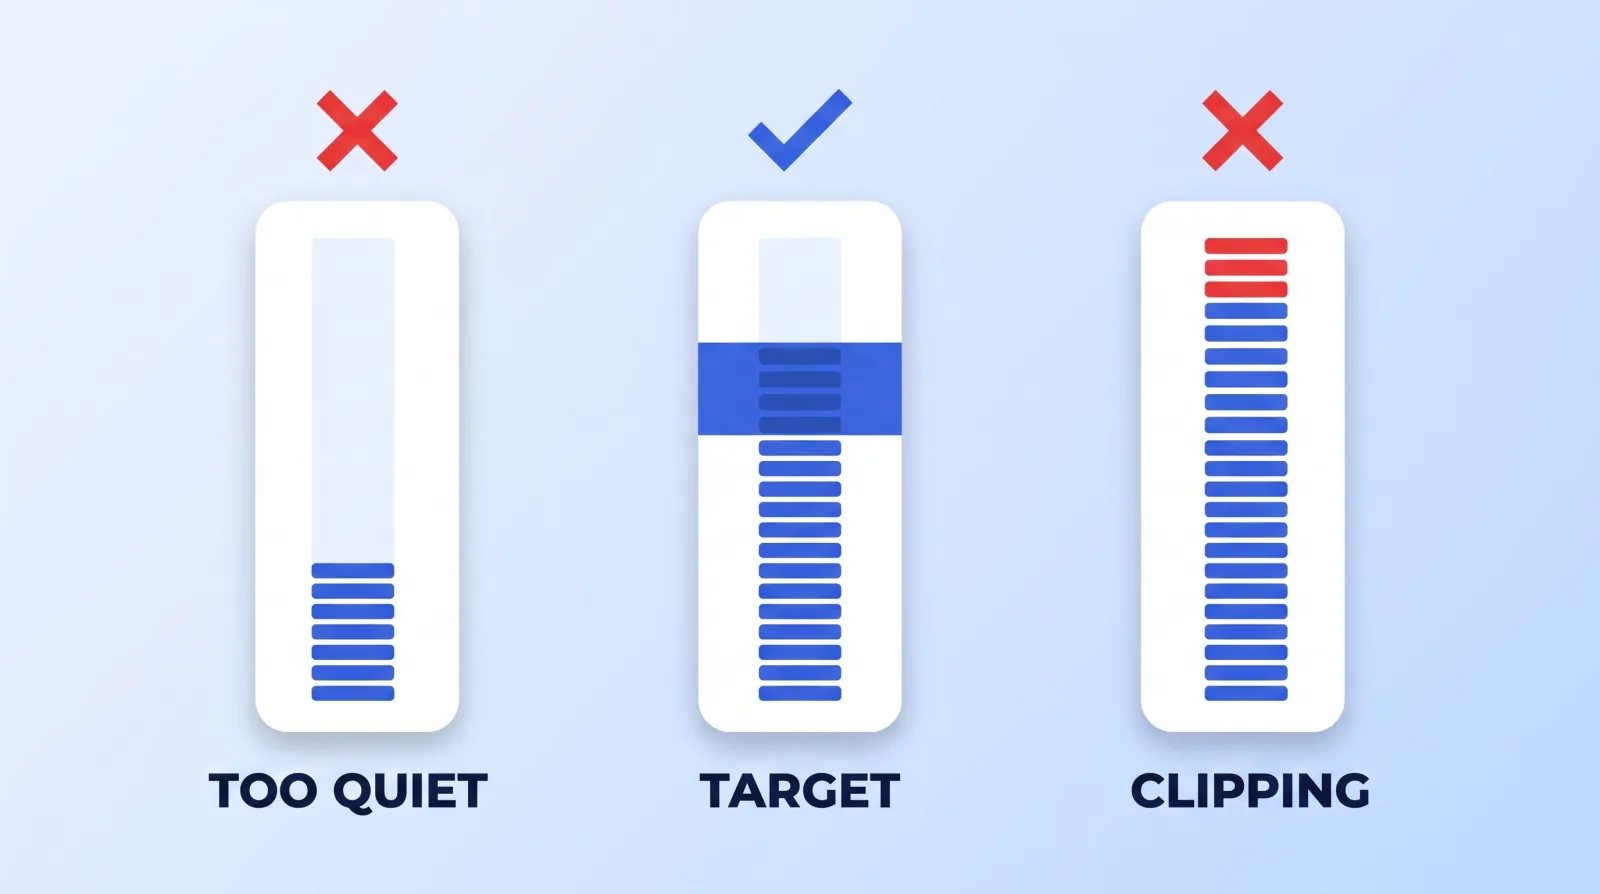
Recording at 24-bit changed this advice and most creators never got the memo. At 24-bit you have so much dynamic range to spare that recording conservatively costs you nothing audible — while recording hot costs you the take.
| Signal | Target |
|---|---|
| Normal speech peaks | −18 to −12 dBFS |
| Loudest moment (laugh, emphasis, shout) | stays under −6 dBFS |
| Room noise floor between phrases | under −60 dBFS |
| Final delivered mix | −14 LUFS integrated |
Three rules we apply on every shoot:
- Set gain against your loudest moment, not your speaking voice. Do the laugh, do the excited line, set the level there. Presenters get 6 to 10 dB louder once the camera rolls.
- Record a safety track at 10 dB below the main, on a second channel, if your recorder supports it. It has saved more client shoots than any other single habit.
- Record 48 kHz. YouTube's own upload spec recommends 48 kHz audio at 384 kbps for stereo, so recording at 44.1 kHz just means a sample-rate conversion nobody asked for.
The 60-Second Pre-Flight Before You Hit Record
We run this gate before every take on a client shoot. It costs a minute and it prevents the reshoot.
- ✅ Clap test done — no audible ring or slap in the space
- ✅ Mouth at the correct working distance for the mic type in the table above
- ✅ Mic off-axis or with a pop filter, so plosives miss the capsule
- ✅ Gain set against the loudest planned moment, peaking under −6 dBFS
- ✅ Headphones on, monitoring the actual recorded signal — not the room
- ✅ 30 seconds of silent room tone captured for the editor
- ✅ Phone, watch, HVAC, and fridge silenced or accounted for
Item five is the one people skip and the one that catches everything. You cannot hear a loose cable, a dying battery, or a mic that flipped to the wrong pattern unless you are listening to what the recorder is actually writing.
What We Can and Cannot Fix Later
Modern repair tools are genuinely good, and that is exactly why creators over-trust them. Descript's Studio Sound and the noise-reduction tools in DaVinci Resolve's Fairlight page will clean up a lot. Neither invents a signal that was never captured.
| Capture problem | Recoverable in post? |
|---|---|
| Steady hum, hiss, fan noise | Yes — this is what de-noise is for |
| Uneven levels between clips | Yes — a normalize pass fixes it |
| Plosives and mouth clicks | Usually, clip by clip |
| Room echo and reverb | Barely — de-reverb costs you presence |
| Mic too far for the whole take | No — the ratio is baked in |
| Clipped peaks | No — that waveform is gone |
The bottom two rows are the ones that force reshoots. For the full picture of where the line sits, we wrote a whole post on what editors can actually salvage, and everything downstream of capture lives in our sound design breakdown. When you hand a project over, note the mic, the distance, and whether a safety track exists — that belongs in the same handoff document you use to brief a video editor.
The Bottom Line
Audio quality is read by your audience as speaker credibility, not as a technical property of the file, which is why a bad room quietly costs you subscribers you never knew you lost. The four links run mic, distance, room, gain — and the three free ones matter more than the one you pay for.
Clap in your room today. If it rings, put a duvet up and move three inches closer to the mic. That is a better upgrade than anything you can buy this week.


